
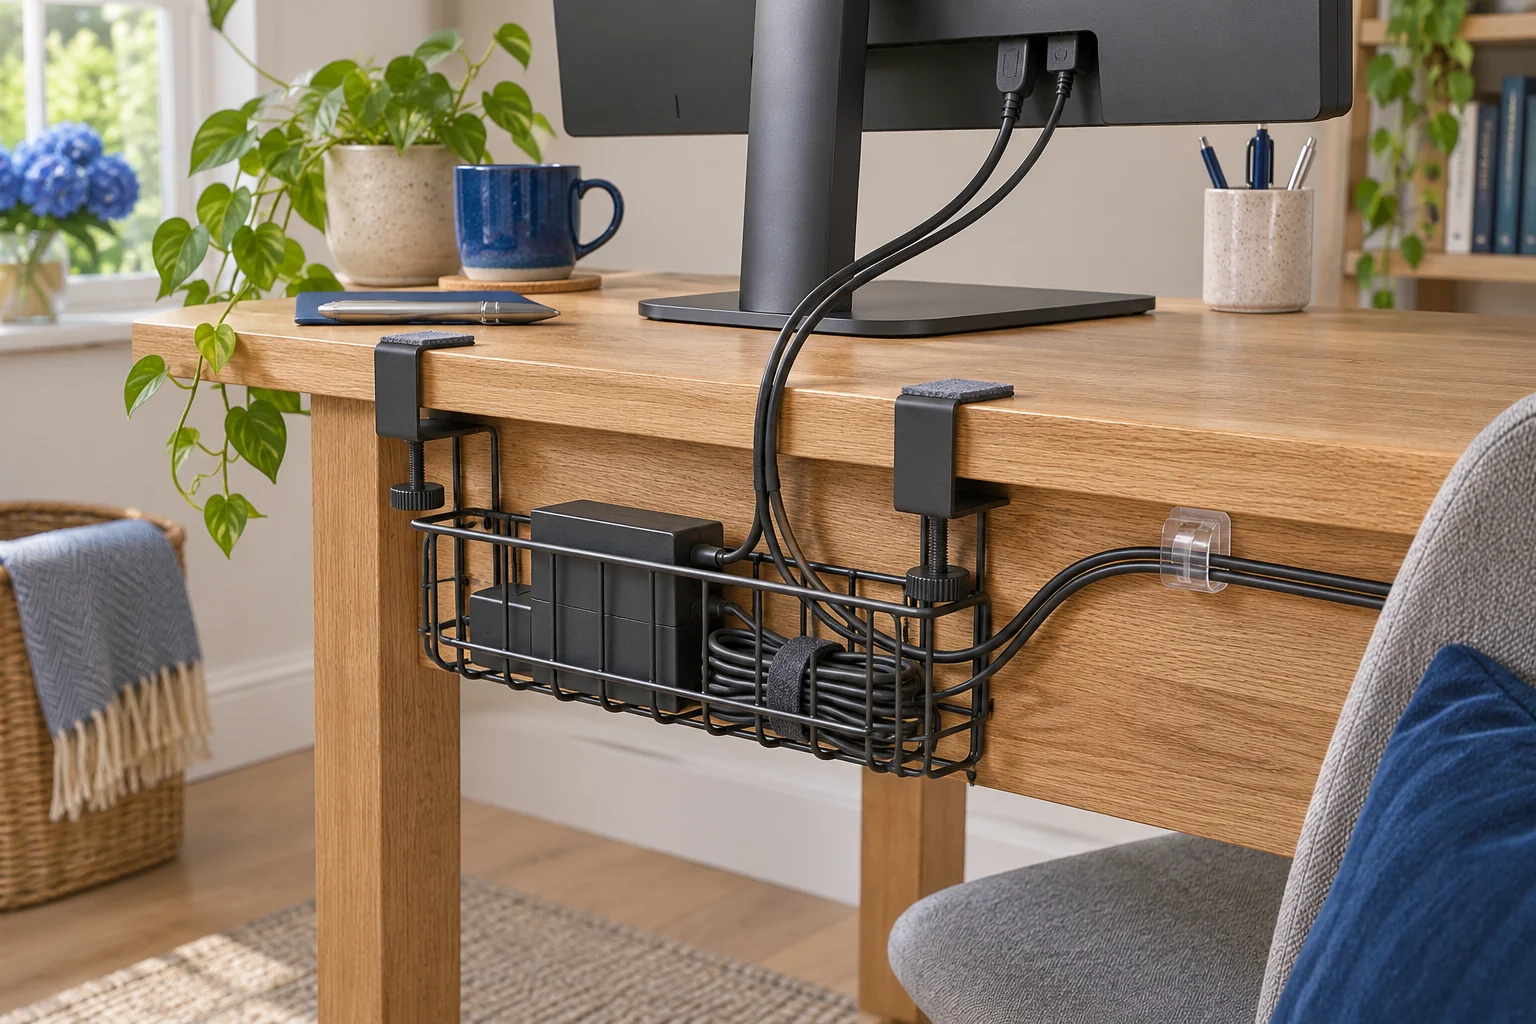
Map the route from device to socket
List the cables that stay plugged in, the ones you unplug daily and the ones that must move with a screen or desk. Start at the equipment and work towards the socket. A charger lead you pull out each evening needs an accessible end. The thick mains lead feeding an extension block needs a clear route that stays away from the chair and door.
Use pieces of paper to mark where a lead might turn or need support. Check the plan with the room in use. Sit down, roll the chair back and open nearby doors and drawers. If the only route crosses a walkway, move the desk or look for an outlet with a safer route before choosing clips.
Leave a service bend near each device so you can reach the plug without tugging it. Bundle only where it helps. Separating the screen lead from the daily laptop charger makes it easier to replace or unplug either one later.
Support plugs and adaptors independently
A clamp-on tray works when the rear or side edge has enough flat surface on both faces and the desk maker permits the load. Check the tray’s intended orientation and make sure the fixing lands clear of the desk frame. If the top has a rolled lip, tapered underside or glass edge, check the furniture maker’s guidance before attaching hardware.
The Duronic CMH2 uses two clamps. Duronic’s drawing shows roughly 5–30 mm of opening, so measure at both pads. Account for the knobs, a nearby monitor clamp and space to reach the switch on the extension block.
For a flat, accessible edge
Duronic CMH2 clamp-on cable tray
Two screw-adjusted clamps hold the open steel basket against a compatible desktop edge.
Check both clamp pads have a flat landing spot. Allow room for the knobs and any monitor-arm fixing.
- Clamp-on
- 40 × 16 × 17 cm outer
- Approx. 5–30 mm clamp opening
Where there is no approved mounting spot, give the extension block a stable accessible place with airflow, clear of moving parts and walking routes. Take the weight off the trailing leads. Keep the equipment within its rating and follow Electrical Safety First’s extension lead guidance.
Use removable clips for light leads
The clear Command round cord clip pack has four clips and five strips. Use it to guide a light lead where the cord can sit in the clip without forcing it open. Leave enough slack for normal use so the cord does not pull on the adhesive. The block and heavy transformers need their own support.
For guiding light cords
Command clear round cord clips
Small clear clips guide light cords along a suitable surface. The pack includes one spare strip.
Check the approved finish, release direction and cord fit. Use a separate support for heavy plugs and adaptors.
- 4 round clips
- 5 adhesive strips
- Clear finish
Read the supplied instructions and confirm the finish is approved before applying a strip. Avoid wallpaper, loose paint and damaged finishes. If you rent, choose a piece of your own furniture where practical and check the rules on using adhesives elsewhere. Place each clip so the release tab remains accessible. Follow the pack’s surface preparation and waiting times. Keep the spare strip for a later move.
Before removal, free the cord first. Use the manufacturer’s release direction and keep the pull tab accessible. A drawer front or furniture frame can block that motion if the strip was fitted tightly against it.
Check access, movement and removal
Plug in the equipment and run through a normal setup and shutdown. Move the screen to its furthest regular position, then park the chair. The connectors should stay seated, the leads should keep a relaxed bend and the cables should stay out of the chair’s path.
Take a photo under the desk and label the desk end of similar leads if you swap devices. Recheck the route when adding a power brick or changing the desk position. If a clip creeps, unload it and review the surface, cord size and pull direction. The tray comparison covers a different support if the weight needs to move off the clips.
For a docking setup, keep the daily connector near the front or side of the desk, where you can reach it with one hand. Test the charger with the laptop both open and closed. A route that works with the lid shut may pull sideways when you turn the laptop to read its screen.
Common questions
How do I hide cables without drilling into a desk?
Use a compatible clamp tray for the equipment and removable cord clips for light leads. Check that each fixing suits the exact edge or finish.
Can adhesive cord clips hold an extension lead?
Use clips to guide a suitably sized cord. Give the extension block and heavy adaptors separate support.
Are Command cord clips suitable for wallpaper?
Avoid wallpaper. Use the surface guidance and application and removal instructions supplied with your exact pack.
What can I do if the desk has no edge for a clamp?
Keep heavier equipment on a stable accessible surface and guide the light cords separately. Check where feet and castors move.
How much slack should I leave?
Leave enough for the full movement of the device and a natural bend at the connector. Test the longest route before fastening the lead.
Sources and selection
Sources and Amazon UK listings checked in November 2026. This guide uses published specifications and fitting guidance.