
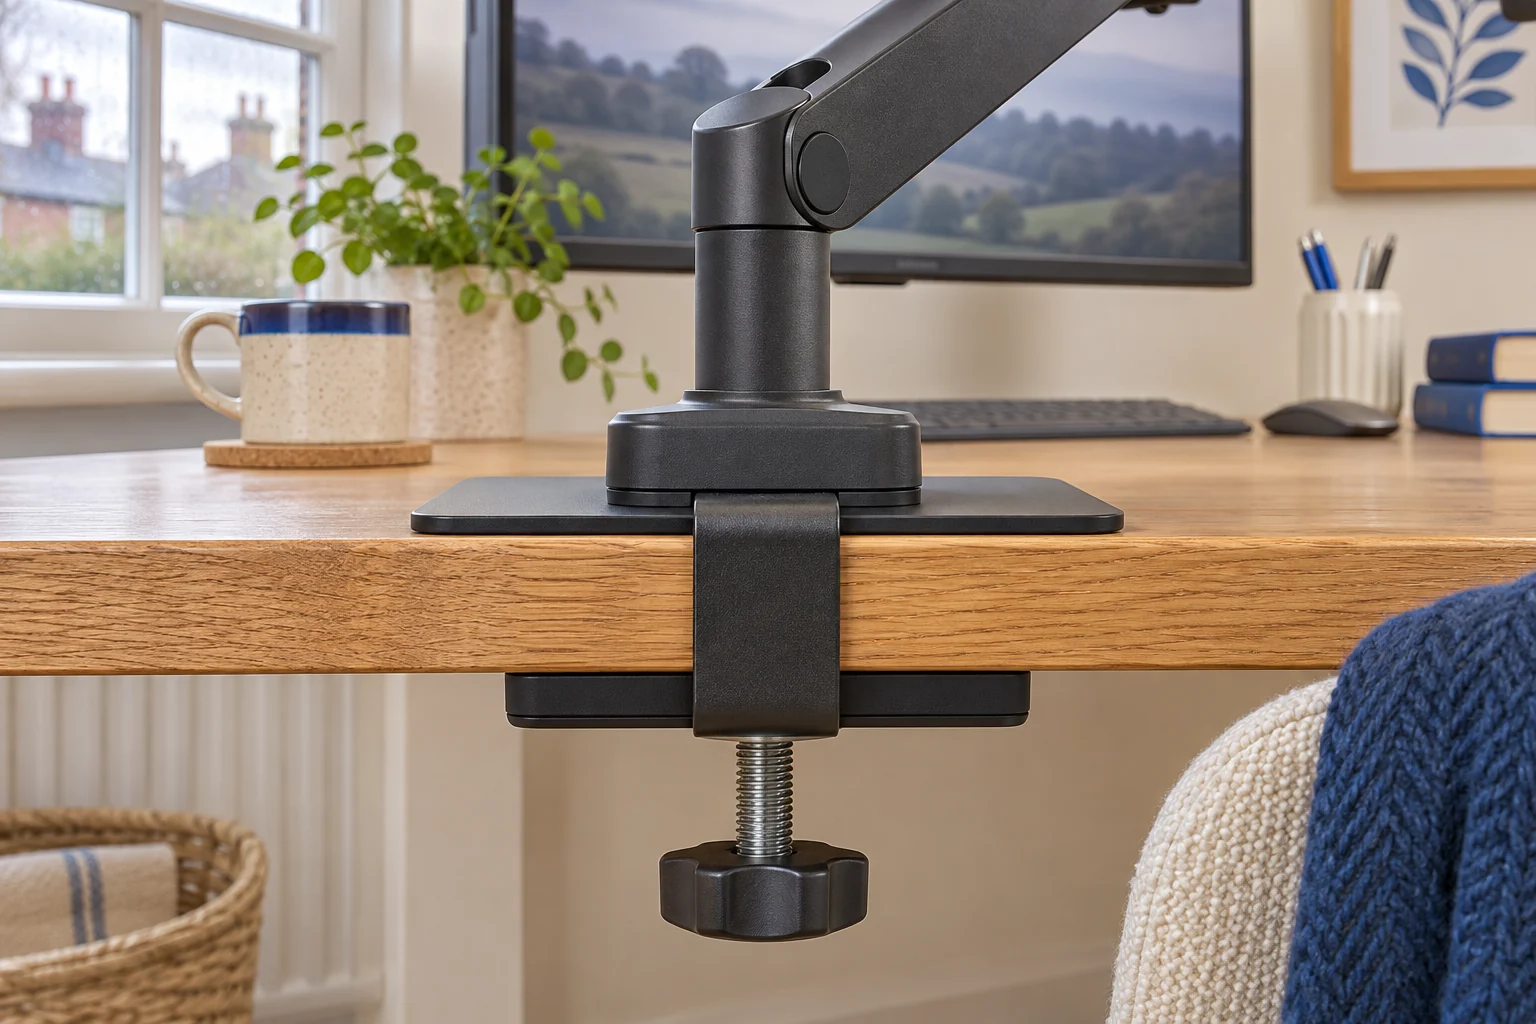
The fit comparison
Compare the published fit limits
Compare both plate outlines before buying. Use an arrangement approved by the desk and arm makers for your exact top and load.
Scroll across the table for every fit check.
| Model | Upper plate | Lower plate | Check first |
|---|---|---|---|
| Duronic DMSC1 reinforcement plate set For a broader upper pad | 22 × 16 cm | 12 × 7 cm | Check both pads and total stack thickness. |
| VIVO STAND-AC01R reinforcement plate set For a shallower lower pad | Approx. 20.1 × 15.5 cm | Approx. 15.2 × 5.1 cm | Allow for 2.5 mm of steel per plate, plus padding. |
Check the desktop and mount first
Start with the desk maker’s fixing instructions. Ask whether it permits the mount, load and proposed contact points. An edge can look solid while the middle is hollow. A plate can spread contact over a broader area of a suitable surface. The structure of the worktop still has to carry the load. A wide plate leaves the arm’s published limit unchanged.
If the desktop is glass, hollow-core, damaged or sagging, use only a fixing method expressly approved by the desk and mount makers for that exact arrangement. If either approval is missing, use the original stand or check a freestanding mount against the surface’s load rating. If an existing clamp has slipped or dented the top, support and remove the screen as directed before assessing the desk.
Trace both pads and add their thickness
Use the maker’s drawing to make two paper outlines. Place the upper one where the arm base will sit. Tape the lower outline to the underside in the clamp’s actual position. Look for a rail, metal lip, drawer or cable tray that interrupts full contact. A rectangle can clear the edge and still extend too far inwards for a crossbar.
Add the desktop thickness to both plates and their padding. For example, a 32 mm top with two 2.5 mm steel plates reaches 37 mm before counting padding. Check that the opening can accept the complete stack, that the jaws reach the bearing spots and that you can turn the tightening knob. Follow the instructions for the fastener and torque, if specified.
Duronic DMSC1 for a broad upper plate
The DMSC1 has a 22 × 16 cm upper plate and a 12 × 7 cm lower plate according to the UK listing. Its smaller underside piece still needs a flat 7 cm-deep area when oriented as instructed. Check the actual plate position relative to the edge and whether it clears the top of a cable tray.
For a broader upper pad
Duronic DMSC1 reinforcement plate set
This steel set spreads contact from a compatible C-clamp across a broader area on an approved worktop.
Check both contact areas and the total clamp stack. Get the worktop and mount makers’ approval for the setup.
- 22 × 16 cm upper plate
- 12 × 7 cm lower plate
- Two-piece steel set
If a drawer rail interrupts the outline, try another approved location and check the arm sweep from there. Moving the clamp sideways can free the lower plate while placing the screen too far away or putting the elbow against the wall. Mock up the screen position before fitting.
VIVO STAND-AC01R for a shallower lower plate
VIVO lists the upper plate at about 20.1 × 15.5 cm and the lower one at about 15.2 × 5.1 cm. The lower plate needs less depth than the Duronic’s and more width. It can suit a long, uninterrupted landing strip where a deeper pad would meet a rail. The steel is 2.5 mm per plate, so count both when working out the clamp fit.
For a shallower lower pad
VIVO STAND-AC01R reinforcement plate set
The VIVO set pairs a broad upper plate with a narrow lower plate for a compatible edge clamp.
Allow space for both full plates on a flat approved surface. Count both pads when checking the jaw opening.
- About 20.1 × 15.5 cm upper
- About 15.2 × 5.1 cm lower
- 2.5 mm per steel plate
Check the final installation as the arm maker instructs, including the position with the arm extended. Keep an eye on the surface and base when you move the screen. If the plate or clamp shifts, stop using the mount and check the fixing with the manufacturers.
Common questions
Do I need a reinforcement plate for every monitor arm?
Use one when the desk and mount instructions call for it or approve it for your setup. Check the exact contact areas.
Can a plate make a glass top suitable?
Use only an installation expressly approved for the exact glass desk, mount and load by the relevant makers.
Does a plate raise the monitor arm’s load limit?
Use the arm’s original limits and the desk maker’s load and fixing limits.
Should I measure above and below the desk?
Yes. Each plate needs the specified flat bearing area. Include both in the clamp opening calculation.
What if a rail blocks the lower plate?
Find another approved fixing spot or choose a compatible alternative that leaves the rail clear.
Sources and selection
Sources and Amazon UK listings checked in November 2026. This guide uses published specifications and fitting guidance.