
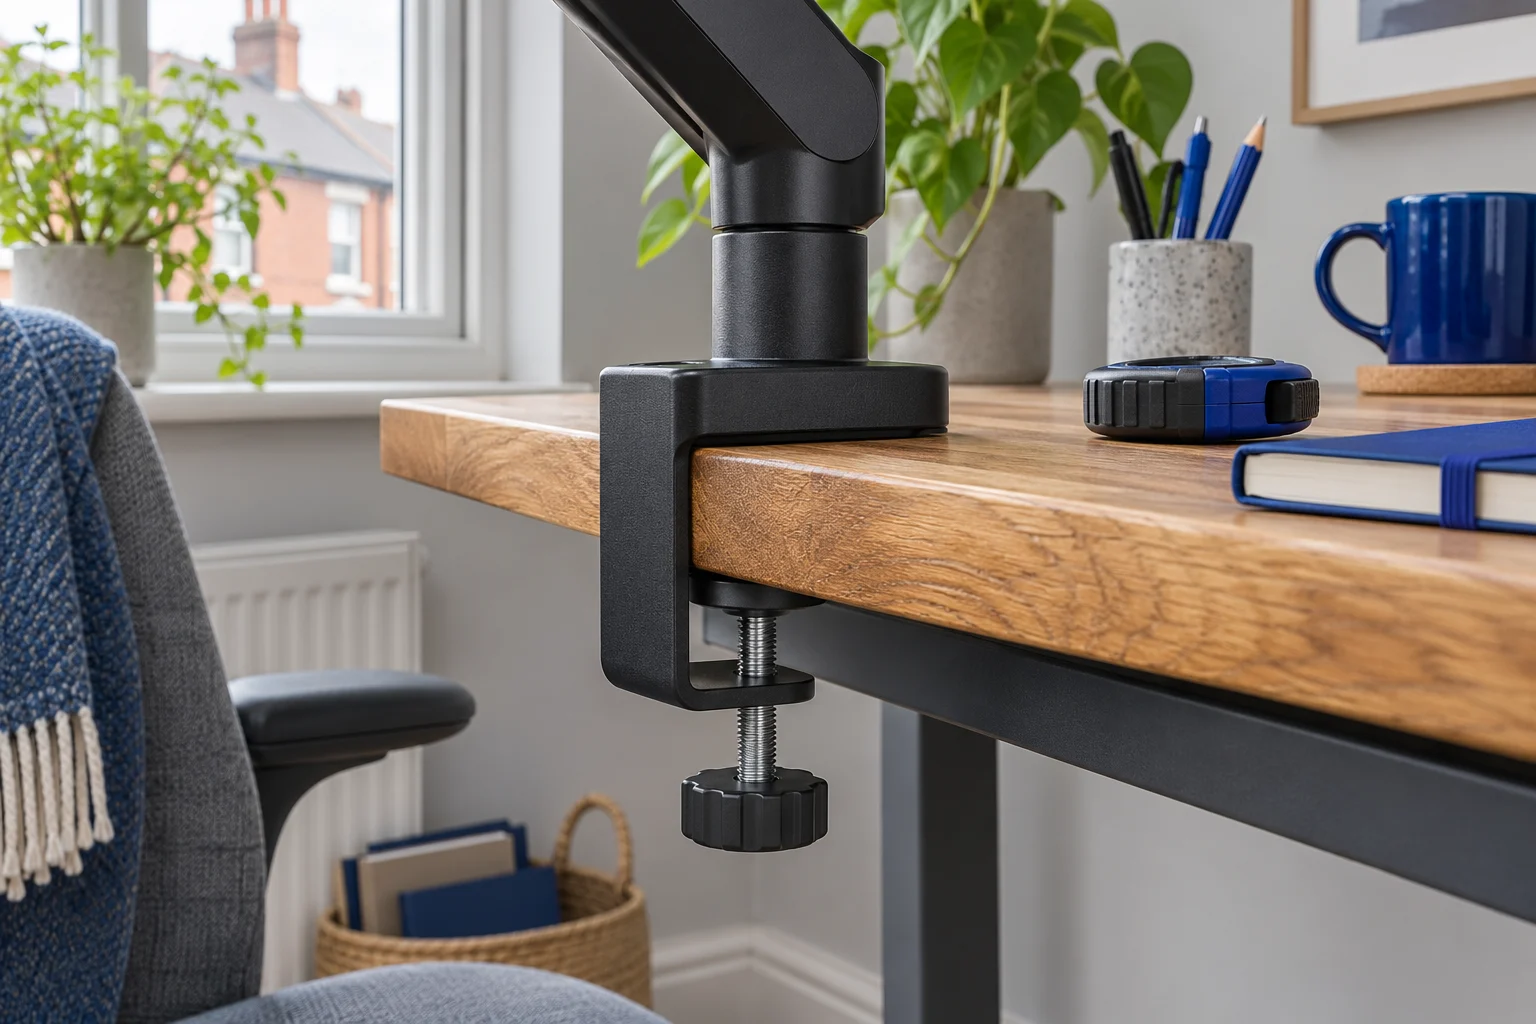
Measure at the exact point the clamp will sit
A monitor arm listing often gives a range of desktop thicknesses. That describes how far the clamp can open in a stated configuration. It does not describe every shape it can grip. Both contact surfaces must seat as the fitting instructions show, and the surrounding space must allow you to assemble and secure the fixing.
Use a tape measure or ruler, a torch and a photo of the underside. Start with an unloaded view of the intended position; do not loosen an existing loaded mount just to inspect the gap. Record measurements in millimetres so you can compare them directly with the manual.
1. The actual bearing thickness
Measure between the surfaces the upper and lower parts of the clamp will contact. A thick decorative edge can differ from the main panel behind it. A metal frame attached below the top is an obstruction unless the mount and furniture instructions explicitly describe clamping around it. Do not count an unsupported overhang or compressible trim as sound bearing material.
2. The flat landing depth below the top
Measure inward from the rear edge to the first rail, drawer, cable tray or change in level. Compare that clear depth with the lower jaw or pressure plate in the exact clamp drawing. There is no universal minimum: different clamp assemblies reach different distances under the desktop.
3. The clear area above the top
Check the upper base footprint as well. A bevel, raised shelf, cable grommet or narrow ledge can stop the base sitting flat. The base may fit along the edge but collide with a wall as you rotate or position the lower arm. Include the base’s orientation, not just its width.
4. The assembly and handle space
Allow enough room below the desk to insert parts and turn the fastener using the specified tool or handle. A lower jaw that would fit once assembled may still be impossible to install beside a fixed drawer. Check whether access is from above, below or both; “top fixing” is a model feature that needs confirmation, not a workaround to assume.
Deal with the obstruction, not just the opening range
Scroll across to compare every column.
| What you find | Why it matters | Next check |
|---|---|---|
| Rear metal rail | Can stop the jaw reaching the underside | Find another approved position or inspect through-desk options |
| Bevelled or rounded edge | May leave partial contact under the base | Compare the full bearing area with the fitting drawing |
| Cable tray | Can block the screw or handle | Check whether the tray can move without altering the desk structure |
| Drawer unit | Can prevent both seating and tool access | Measure at a different permitted edge position |
| Hollow or unknown top | Thickness does not establish strength | Obtain the furniture maker’s mounting guidance |
Avoid filling a gap with loose blocks or overtightening across an uneven edge. That changes the contact arrangement from the one the mount was designed to use. A reinforcement plate also needs to fit flat and be approved for the desktop; it cannot resolve every structural problem.
Use the exact model’s dimensions
One adjustable screen: Invision MX200
The current MX200 base manual gives a 10–90 mm clamp range. A measured 25 mm desktop is inside that range, but still needs the flat contact and underside space described above. Match the base in the instructions to the hardware supplied, particularly if a listing or older video shows a different revision.
An everyday adjustable screen
Invision MX200
The gas-assisted arm suits a single compatible screen you move between tasks. It frees the desk from a broad stand and gives you a choice of edge clamp or through-desk fixing.
A centred clamp can leave the elbow in the way of the wall. Check whether the clamp can sit to one side while keeping the screen centred. Match the fitting diagram to the base supplied.
- 19–32″
- 2–9 kg
- VESA 75 × 75 or 100 × 100 mm
A vertical pair: Duronic DM35V2X1
The Duronic’s published 5–68 mm range differs from the Invision’s. It is a useful reminder that there is no standard clamp opening across monitor mounts. A 70 mm edge is outside this stated Duronic range even if another arm’s clamp opens further. The tall two-screen installation also needs desktop approval for its complete load.
A compact two-screen stack
Duronic DM35V2X1
Two separate mounting heads on a tall pole put compatible screens one above the other. Short arms suit a stack that stays largely in position.
Each screen must meet the 13–27 inch and 8 kg limits. The 80 cm figure is pole height, not a guaranteed screen-centre range. Check casing heights and VESA offsets. The optional DM-GR-01 grommet kit is separate.
- 13–27″ each
- Up to 8 kg each
- VESA 75 × 75 or 100 × 100 mm
For another example, the VIVO V001 and V002 pages and manuals differ slightly at the upper thickness limit. Where your measurement is close to a limit, confirm the exact supplied configuration with the manufacturer before ordering. Do not round a borderline measurement down to make it fit.
If the edge cannot take the clamp
An offset fixing may avoid a rail while still placing the screen correctly, provided the desktop permits it and the arm has suitable reach. Trial that layout before assuming the arm can reach back to the centre. If you use two monitors, two singles versus one dual can change the available attachment positions.
A through-desk fixing can avoid a blocked rear edge, but needs an approved hole, correct thickness and flat contact around the bolt. It is not permission to drill an unfamiliar top. A freestanding mount avoids the attachment, while keeping a base on the working surface.
Once the geometry works, check desktop construction and the complete load. Geometry and structural suitability are separate checks. Keep your measurements and underside photograph with the model’s fitting diagram so the manufacturer can answer a precise question if any dimension remains unclear.
If the manufacturers approve a plate, compare upper and lower reinforcement plate footprints before fitting.
For an unusually thick top, compare the wide-opening clamp options. If the jaw catches on a frame member, measure the strip behind the rear rail.
Common questions
How much space does a monitor clamp need under the desk?
It depends on the lower jaw, screw and installation method. Measure clear depth to the first obstruction and vertical room for the assembly, then compare the exact model’s fitting drawing.
Can the clamp grip a metal desk rail?
Only if both the mount and furniture instructions approve that arrangement. A rail may be an obstruction rather than a suitable bearing surface. Do not improvise around it with partial contact.
Does the stated desk thickness include a reinforcement plate?
The assembled bearing thickness must fit the clamp’s specified range. Any plate must also be approved for the top and lie flat. Confirm how the manufacturer defines the complete stack in its instructions.
Can I clamp to a bevelled desktop edge?
A bevel may prevent full contact even when the overall thickness fits. Compare the full flat bearing area required by the base and lower jaw; use another approved position if it cannot seat correctly.
What if my measurement is exactly the published maximum?
Check measurement accuracy, the supplied base revision and the fitting diagram. Ask the maker to confirm a borderline fit, especially if the website and manual state slightly different limits.
Sources and selection
Specifications and Amazon UK configurations reviewed in November 2026. Recommendations compare published fit information. Check the current listing and instructions supplied with the exact model.